
How to Add FAQs to Your Website
This guide will explain how to add FAQs to your website and provide instructions for several website hosting platforms
Step 1: Go to the Automation tab in Paige, then click on Website & AI SEO
-
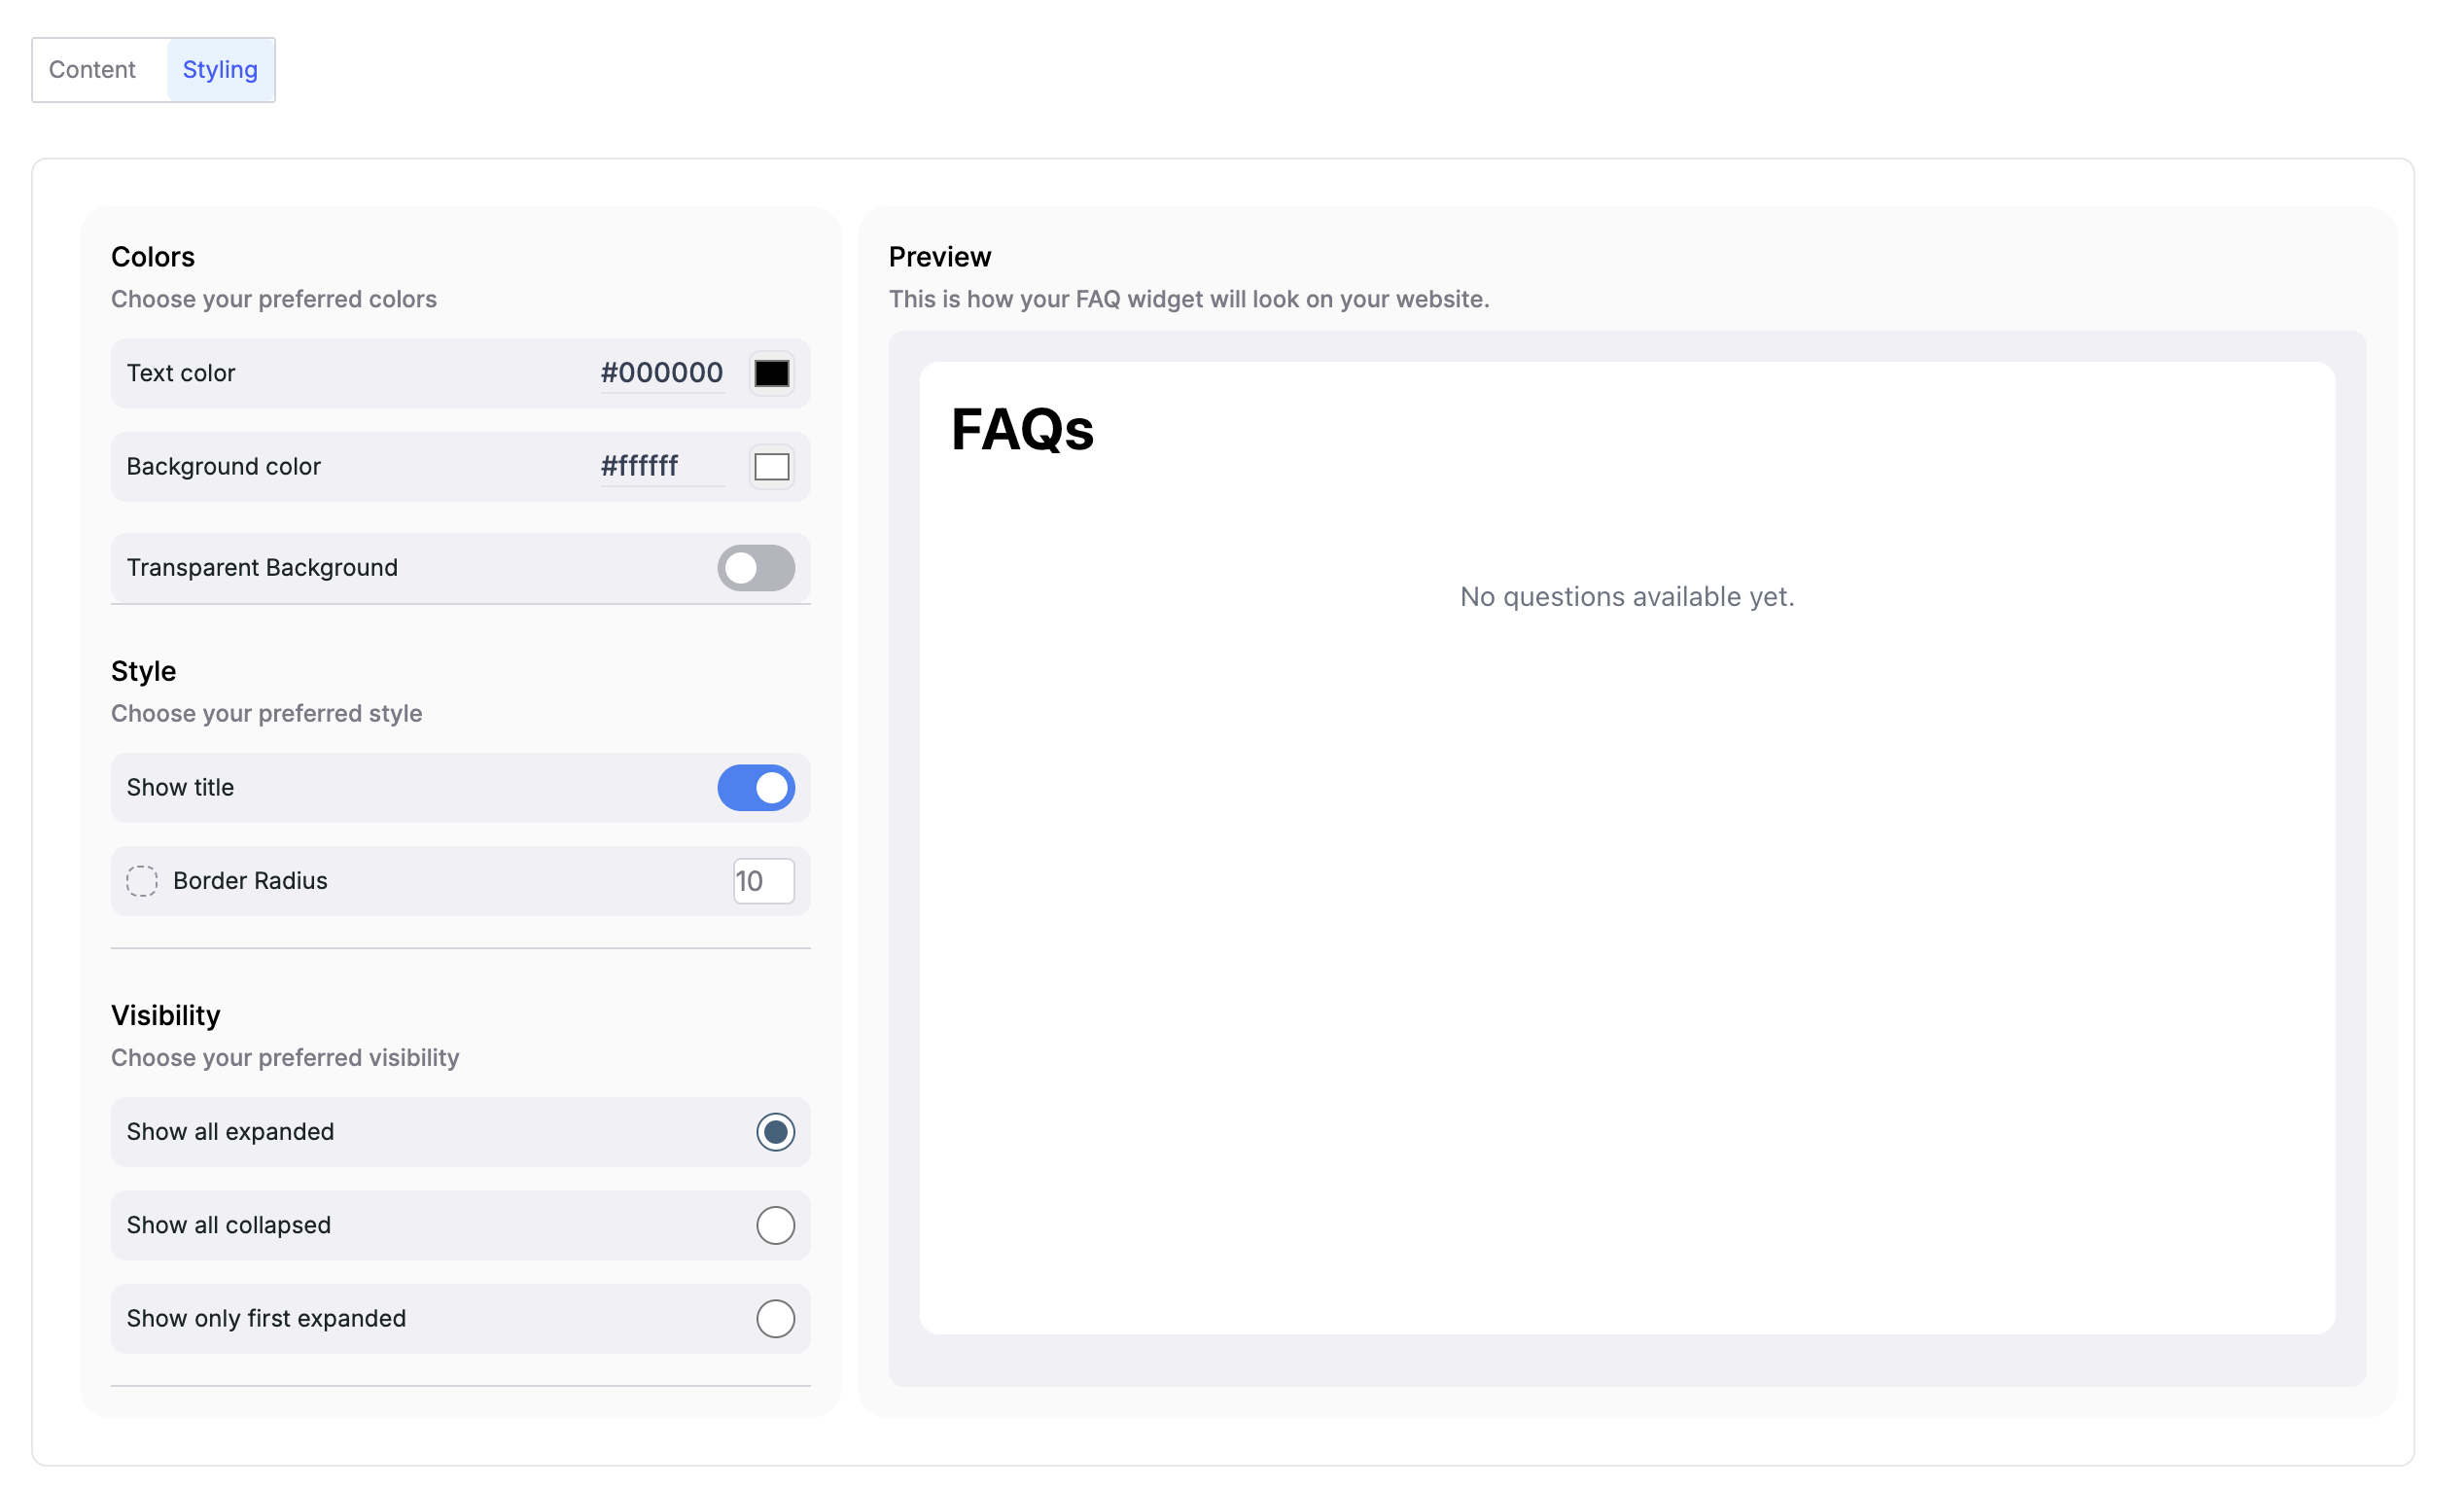
Set the style of the FAQs that you're happy with in the Styling Settings.
Step 2: Copy the code provided in Paige
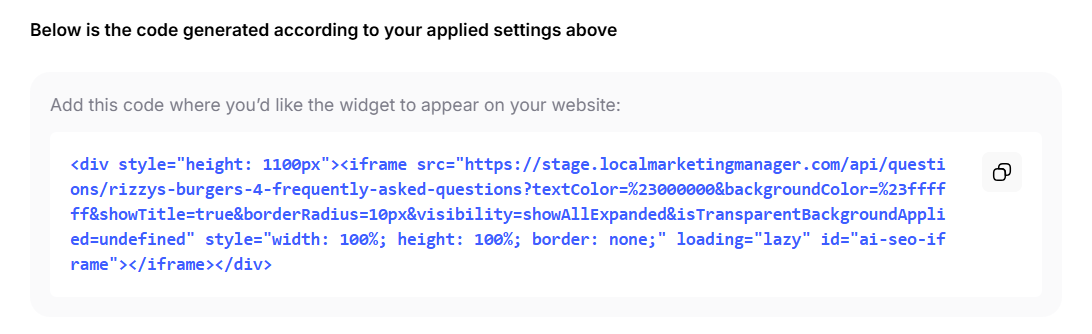
Step 3: Add code into your website
Wix: Two straightforward approaches: Embed HTML and Velo (advanced).
A. Embed HTML (Editor)
- In the Wix editor click Add → Embed → Custom Embeds → Embed HTML.
- Drag the box to where you want the FAQ and click Enter Code.
- Paste the entire widget (HTML + CSS + JS). If Wix strips the
<script>, host the JS externally (see note below). - Resize and save/publish. Test preview.
B. Velo (if you need JS that interacts with the rest of the site)
- Turn on Velo (Dev Mode).
- Create an HTML file in the Public folder or use an external script URL.
- Add an HTML iFrame element and point it to your hosted HTML page, or inject HTML into a page element via Velo APIs.
- Publish.
Wordpress: Two common ways - Block Editor (Gutenberg) and Theme / Classic editor.
A. Block Editor (best for most users)
- Open the page/post where you want the FAQ.
- Click ➕ to add a block, search “Custom HTML” and add it.
- Paste the entire example widget HTML/JS/CSS into the Custom HTML block.
- Click Preview then Update/Publish.
- Test on mobile. If styling conflicts, wrap the widget in a container and use more specific CSS selectors.
B. Classic Editor / TinyMCE
- Switch to the Text (HTML) tab.
- Paste the widget where you want it.
- Save and preview.
C. For theme/global insertion (site footer/header)
- Go to Appearance → Theme Editor (or use a child theme).
- To add globally, paste the
<script>portion before</body>infooter.phpand the HTML where appropriate (e.g., inside a template). - Safer option: create a shortcode in
functions.php: - Use
[my_faq]in pages.
SquareSpace: Use Code Block for a single page, or Code Injection for site-wide scripts.
A. Page-level (Code Block)
- Edit the page → Insert Block → select Code block.
- Paste the widget HTML/CSS/JS. Check the “Display Source” toggle is OFF (so it runs).
- Save and preview.
B. Site-wide / header/footer (Code Injection)
- Settings → Advanced → Code Injection.
- Put global scripts (like widget JS) in the Footer or Header box (footer recommended for performance).
- Put the widget HTML on pages using a Code Block or include it via a snippet loaded from your host.
Shopify: Use Shopify’s Built-In Features (Easiest Method)
-
Shopify themes often include structured data (JSON-LD) for products and blogs automatically.
- Check if your theme already has it:
- Open a product page in Chrome.
- Right-click → View Page Source.
- Search for
application/ld+json.
- If it exists, you may just need to customize it.
2. Use a Shopify App If your theme doesn’t include all the schema you want:
- Go to the Shopify App Store and search for “SEO & Schema” or “JSON-LD”.
- Popular apps:
- JSON-LD for SEO
- Smart SEO
- Schema Plus for SEO
- These apps let you add schema without touching code.
3. Add Schema Directly to Your Theme (Manual Method)
- Go to Online Store → Themes → Actions → Edit Code.
- Find the template you want to modify:
- Products:
product.liquid - Collections:
collection.liquid - Pages:
page.liquid
- Products:
- Add a
<script type="application/ld+json">block with your schema. Example for a product:
<script type="application/ld+json"> { "@context": "https://schema.org/", "@type": "Product", "name": "#{{ product.title }}", "image": "#{{ product.featured_image | img_url: 'large' }}", "description": "#{{ product.description | strip_html | escape }}", "sku": "#{{ product.sku }}", "offers": { "@type": "Offer", "url": "#{{ shop.url }}#{{ product.url }}", "priceCurrency": "#{{ shop.currency }}", "price": "#{{ product.price | money_without_currency }}", "availability": "{% if product.available %}https://schema.org/InStock{% else %}https://schema.org/OutOfStock{% endif %}" } } </script>
- Save and test using Google’s Rich Results Test:
- https://search.google.com/test/rich-results
4. Tips
- Always validate your schema after adding it.
- Focus on Products, Reviews, FAQs, and Breadcrumbs for Shopify sites.
- If you’re using Shopify 2.0, JSON-LD may already be included for products and collections — only add custom schema if needed.
Weebly: Use the Embed Code element or add global code.
A. Page embed
- In the site editor, drag the Embed Code element onto the page.
- Click the element and choose Edit Custom HTML.
- Paste the whole widget. Save and publish.
B. Site footer (global)
- Settings → SEO → Footer Code (or a similar site code injection area depending on theme).
- Add widget
<script>or the HTML container if you want it site-wide.
Didn't find what you needed?
Tell us what's missing or unclear and we'll improve this article.
Still need help?
Our team is available to help you with any questions about your local SEO setup. Just log in to Paige and start a live chat.